Longtime blog readers will know that the reason my husband and I moved from NYC to Colorado, was to live close to our children and grandchildren. They are our life's most precious gifts, and our family means everything to us. Whenever I have a family gathering at my home I try to make half, if not all, the food I serve gluten-free, as I have a gluten sensitive grandson. I recently posted a photo of the gluten-free Italian Rainbow cookies I make for the Christmas holiday on my personal facebook page and had many requests for the recipe, so I decided to share my recipe here. If you are looking for a special gluten-free cookie recipe to share with your family year-round, these Italian Rainbow Cookies, also known as Seven Layer Cookies, are delicious!
Gluten Free Italian Rainbow Cookies
For the past few years, I have used a recipe that I found on Nicole's blog, "Gluten-Free on a Shoestring." She has beautiful step by step photos in her post. I've tweaked it a little for my taste and I'll put my additions in red print in the recipe.
Ingredients:
For cookies and filling:
8 ounces almond paste. Read the label to make sure it is gluten-free. I usually use Solo brand
16 Tablespoons of butter--two sticks--softened
3/4 cup sugar
4 large eggs. at room temperature, beaten\
1 teaspoon good quality almond extract
2 cups all-purpose gluten-free flour (Nicole uses a brand called Better Batter. I use King Arthur Flour's gluten-free blend or Namaste Gluten Free Flour. A primary rice base flour, white and brown, works best in this recipe)
I teaspoon xanthan gum--omit if your flour mix already as it
1/4 teaspoon kosher salt
Red liquid food coloring, about 8-10 drops (I use more drops to make it a deeper red)
Green food coloring, about 8-10 drops (I use more drops to make it a deeper green)
Seedless Raspberry jam (I always use Smuckers brand)
Apricot jam ( I always use Smuckers brand)
For chocolate topping:
6 ounces semisweet chocolate, chopped
2 tablespoons unsalted butter
1/3 cup heavy cream
Directions:
Heat oven to 350 degrees Fahrenheit
Line three 9 X 12-inch sheet pans with unbleached parchment paper (in a pinch, I've also used waxed paper that has been brushed with melted butter.)
Make the cookie dough:
In a stand mixer with a paddle attachment or large bowl with hand mixer), cream the almond paste and butter till well combined--some small pieces of the almond paste may still be visible but that is fine. Add the sugar and eggs and the almond extract, beating well after each addition. The batter should be thick. Add the flour, xanthan gum if needed and the kosher salt a little at a time until the dough comes together and is smooth, scraping down the sides and bottom of the bowl and the mixing paddle.
Divide the dough into three equal parts. In one part add the green food coloring and mix well. Leave second part uncolored. To the third part add the red food coloring and mix well.
Divide the 3 prepared doughs into the three prepared pans, Stretch and press the dough into an even layer in each of the pans, using wet fingers and a wet spatula. The dough will be sticky. The first time I tried this recipe I thought the dough was hard to work with, but I found it is easier if you remove the parchment paper to a flat surface, and spread the dough with a well moistened or greased spatula into the approximate size of the pan. Do not worry about the edges being very even, as they are trimmed off in the final product.
Bake and assemble the layers:
Place each pan, one at a time, in the center of a preheated oven and bake for approximately 10 minutes, or until dough begins to brown slightly around the edges. Do not over bake. Lift parchment paper from the pan and cool on a rack.
To assemble, begin with the green layer. Place carefully on a clean piece of parchment paper and spread a small amount of raspberry jam on top, adding just enough to cover all. Then lay uncolored layer on top, removing baking parchment paper if it sticks to it. Add the apricot jam to this layer, removing any large lumps of fruit. Add just enough apricot jam to cover the cookie layer. Then carefully add the red layer over uncolored layer. Add a fresh piece of parchment paper over the red layer and then weigh down the layers with a heavy cutting board or book. Place in the refrigerator for at least 30 minutes to compress layers. I often leave this overnight to ensure the layers are melded together.
Make the chocolate topping:
Place the chopped chocolate in a medium-size heat-safe bowl. In a small saucepan heat the cream and butter over medium-low heat, stirring frequently, until the butter is melted and the cream is beginning to simmer. Pour the hot butter and cream mixture over the chopped chocolate, and mix to combine. The chocolate should be smooth and shiny. Pour the melted chocolate over the cookie layers and spread with a spatula till it covers all. Chill once more in the refrigerator until the chocolate topping is set (about 20 minutes). Using a large serrated knife, trim off all the edges, and then slice into about 21 even rectangle slices. Store in airtight container in a cool place. Can be wrapped tightly and frozen.
I hope you enjoy these cookies!
If you'd like the recipe for the regular Italian Rainbow Cookies I also make every Christmas, it can be found on my blog at this link.
The days leading up to Christmas were busy ones for us, as our grandchildren had school and church pageants and shows, and our eldest grandson had a fun 9th birthday! I did quite a bit of baking and we spent time with friends at different events as well. Christmas Eve and Day were filled with lots of good food and fun presents for the children. The entire month seemed to fly by!
I want to wish everyone a very Happy, Healthy, Peaceful and Prosperous New Year, 2018! Thank you for being faithful readers of my blog and for all your comments all year round and for following me on Instagram, Facebook, Twitter, Pinterest, and Google Plus. I'm always excited by a new year, as it begins as a clean page and a new beginning in life. It's a time to feel grateful for all of life's blessings and to hope and dream that the coming year will bring even more.
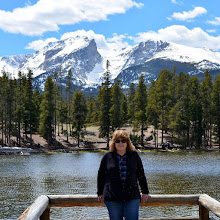
The photo above is one of my favorites from 2017, taken in Spring in Rocky Mountain National Park. The snow was over our heads when we traveled up to its higher elevations--truly a sight to be seen! I often use the hashtag #lovelivinginColorado on Instagram, as I really do love living here! I feel fortunate to have lived most of my life in Brooklyn, New York, but spending my retirement years in Colorado has been a dream come true for me. There is so much of the western part of the United States I still hope to see, and my goals this year is to travel to more parts of Colorado that I have yet to see.
I also plan on recapping the trip my husband and I took to Italy in the summer of 2017, on my blog, beginning this month. When we returned from that trip I sadly learned of the passing of my brother-in-law, and I was too sad to think of the happy time we had in Italy while he was unexpectedly suffering from fast-acting cancer.
In 2018 lets us treasure each new day as a gift, and do our part to make the world a better place.
Happy New Year!
I'm linking this post to the following blog events:
Amaze Me Monday, Mosaic Monday, All Seasons, Blue Monday, Blogging Monday, Through My Lens Monday, Inspiration Monday, Blogging Grandmothers, You Are the Star Blog Hop, Good Random Fun, Nature Notes, Grand Social, Photo Tunes, Happiness Is Homemade Tuesday Talk, Tuesday Treasures, Our World Tuesday, Ruby Tuesday, Party in Your PJ's, Wordless Wednesday, Oh My Heartsie Girl's Wonderful Wednesday, Outdoor Wednesday, Wonderful Wednesday, Link it Up Wednesday, Share Your Cup Thursday,Little Things Thursday, No Rules Blog Linky, Travel Photo Thursday, Thankful Thursday, Thursday Favorite Things, Friendship Fridays, Friday Photo Journal, Skywatch Friday, Sweet Inspiration, Weekend Travel Inspiration, Pink Saturday, Over the Moon, Happiness Is Homemade
Thank you blog hosts!


 Posts
Posts