This month's challenge is brought to us by Karen of
Bake My Day and Zorra of
1x umruehren bitte aka Kochtopf. They have chosen Tuiles from The Chocolate Book by Angélique Schme ink and Nougatine and Chocolate Tuiles from Michel Roux.
Traditionally, tuiles are thin, crisp cookies that are gently molded over a rolling pin or arched form while they are still warm. Once set, their shape resembles the curved French roofing tiles for which they're named.
In the Netherlands this batter was used to bake flat round cookies on December 31 st, representing the past year unfolded. On New Years day, however, the same batter was used but on this day they were presented to well-wishers shaped as cigars and filled with whipped cream, symbolizing the New Year that's about to roll on.
Following is a recipe taken from a book called “The Chocolate Book”, written by female Dutch Master chef Angélique Schmeinck.
Recipe:Yields: 20 small tuiles/6 large tuiles
Preparation time: batter 10 minutes, waiting time 30 minutes, baking time: 5-10 minutes per batch
65 grams / ¼ cup / 2.3 ounces softened butter (not melted but soft)
60 grams / ½ cup / 2.1 ounces sifted confectioner’s sugar1 sachet vanilla sugar (7 grams or substitute with a dash of vanilla extract)
2 large egg whites (slightly whisked with a fork)
65 grams / 1/2 cup / 2.3 ounces sifted all purpose flour
1 table spoon cocoa powder/or food coloring of choice
Butter/spray to grease baking sheet
Oven: 180C / 350F
Using a hand whisk or a stand mixer fitted with the paddle (low speed) and cream butter, sugar and vanilla to a paste. Keep stirring while you gradually add the egg whites. Continue to add the flour in small batches and stir to achieve a homogeneous and smooth batter/paste. Be careful to not over mix.
Cover the bowl with plastic wrap and chill in the fridge for at least 30 minutes to firm up. (This batter will keep in the fridge for up to a week, take it out 30 minutes before you plan to use it).
Line a baking sheet with parchment paper or grease with either butter/spray and chill in the fridge for at least 15 minutes. This will help spread the batter more easily if using a stencil/cardboard template such as the butterfly, or other shape. Press the stencil on the baking sheet and use an off sided spatula to spread batter. Leave some room in between your shapes.
If you don’t want to do stencil shapes, you might want to transfer the batter into a piping bag fitted with a small plain tip. Pipe the desired shapes and bake. * This is what I did!
If desired, mix a small part of the batter with the cocoa and a few drops of warm water until evenly colored. Use this colored batter in a paper piping bag and proceed to pipe decorations on the tuiles.
Bake the tuiles in a preheated oven (180C/350F) for about 5-10 minutes or until the edges turn golden brown. Immediately release from baking sheet and proceed to shape/bend the cookies in the desired shape.
These cookies have to be shaped when still warm, you might want to bake a small amount at a time or maybe put them in the oven to warm them up again. Or: place a baking sheet toward the front of the warm oven, leaving the door half open. The warmth will keep the cookies malleable.
Shape immediately after baking using for instance a rolling pin, a broom handle, cups, cones….
* I used a small round metal tube to roll mine.

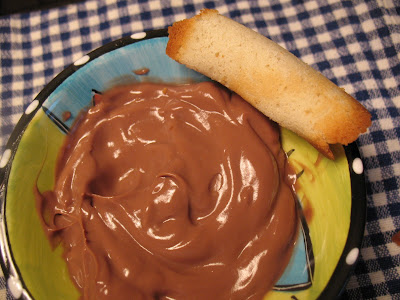
To serve I made a low fat chocolate pudding and served them along side, instead of trying to fill the little cookie shells with frosting or whipped cream.

They were light and tasty and in this combination a diet wise dessert. I'll definitely make them again!
If you would like to see wonderful versions of tuiles, made by other members of The Daring Bakers, check the Daring Bakers
blogroll. There were three versions of the tuiles recipe that we were allowed to choose from, so some DB's made them with almonds and some made them in a savory version...check them out!
There is also an open forum for general baking discussions
here, but you have to be a member of Daring Bakers in order to register to log in for each month's challenge and discussions regarding it.
If you think you are up to taking the monthly challenge instructions are on the
blog as to how to join! Don't delay, as there is only a 24 hour time limit to join every month for the next month's challenge.
I hope to see you all doing the February Daring Baker Challenge!
 The history of the Pink Teacup from it's website:
 The cozy, no reservations and "cash only" restaurant has soft rose-colored walls and crowded rows of petite wooden tables. It serves hearty portions of grits, fried chicken, biscuits, collard greens, pork chops, and biscuits, among other entrees and sides, and all dinners are served with two vegetables, soup, salad, hot bread, Jello or bread pudding.


 photo source


